

How to make your own DIY no sew curtains with passementerie trim using hem tape for grandmillennial style on a budget.
For the longest time, I have envisioned a pair of gorgeous grandmillennial cottage style curtains for the bedroom for our younger daughter ever since I hung the chinoiserie wallpaper in this space.
There were only two problems:
1. Curtains with that pretty passementerie detail are insanely pricey. I love these trimmed curtains from Frontgate, but they cost over $1,000 for just one panel!
2. I can’t sew if my life depends on it. (Believe me, I’ve tried.)

How do you make curtains without sewing?
You don’t have to know how to sew to make curtains or add embellishments. I used the best hack to make my own no sew curtain DIY: hemming tape. It’s a no sew permanent fabric adhesive.
The curtains turned out so beautifully! (And cost about $50 for both curtain panels by upcycling old curtains.)
I saved these pom pom trim curtains we had in our older daughter’s room after her Swedish cottage style bedroom makeover to use for this project.
Passementerie is a decor detail that’s definitely trending with the upswing of grandmillennial style. Even though designer versions are pricey, it’s fairly easy to do yourself inexpensively.
If you have some lackluster curtains already hanging on your windows that you want to elevate, this no sew tutorial will definitely come in handy. You can use this method to make curtains from scratch too.

How to Change Curtain Headings With Tape
Even though I used Heat n Bond hemming tape for this method, you could follow the same steps just using hot glue or a micro stitch kit.
However those two alternative methods aren’t quite as durable. I highly suggest using Heat n Bond.
Supplies Needed
Before adding the curtain trim, I changed the curtain heading first for a more tailored look. This method could work on curtains made from scratch as well.
How to Make DIY No Sew Curtains from Scratch
- Measure and cut curtain fabric of your choosing to the width and length you need.
- Create a finished edge around the perimeter of the fabric by folding 1 inch of fabric over the Heat n Bond tape.
- Iron it in place to create an edge “seam”.
More step-by-step instructions are below to demonstrate.
Step 1 – Remove existing embellishments and/or cut panels to length
Using your fabric scissors or a seam ripper, cut away any existing trim. I just snipped the pom poms off of my old panels.
I also measured how long I needed the curtains to be on the new window and cut off any excess fabric at the bottom of the panels, sparing about 3 inches that I would turn under to make a finished hem later.

I wanted these curtains to hang from curtains rings. But I wanted the clean look of header tape instead of using ring clips. So I cut off the back tabs first with the fabric scissors.

Step 3 – Measure and cut curtain header tape
I used this curtain header tape, measuring it to the length of my existing curtain header.
Run a lighter briskly along the cut edge of the header tape to prevent fraying. You can also apply clear nail polish along the cut header tape to stop fraying.
Set aside.

Step 4 – Iron on one side of hemming tape
Measure and cut two lengths of Heat n Bond tape along the backside of the curtain panel header.
(I discovered I bought the wrong strength of Heat n Bond for this step. I highly recommend this heavy weight Heat n Bond to handle this job.)

Remove the paper backing from one side of the hemming tape. Place the non-paper side of the tape on the backside of the curtain. (You can pin the tape in place if you want, but I did fine without.)
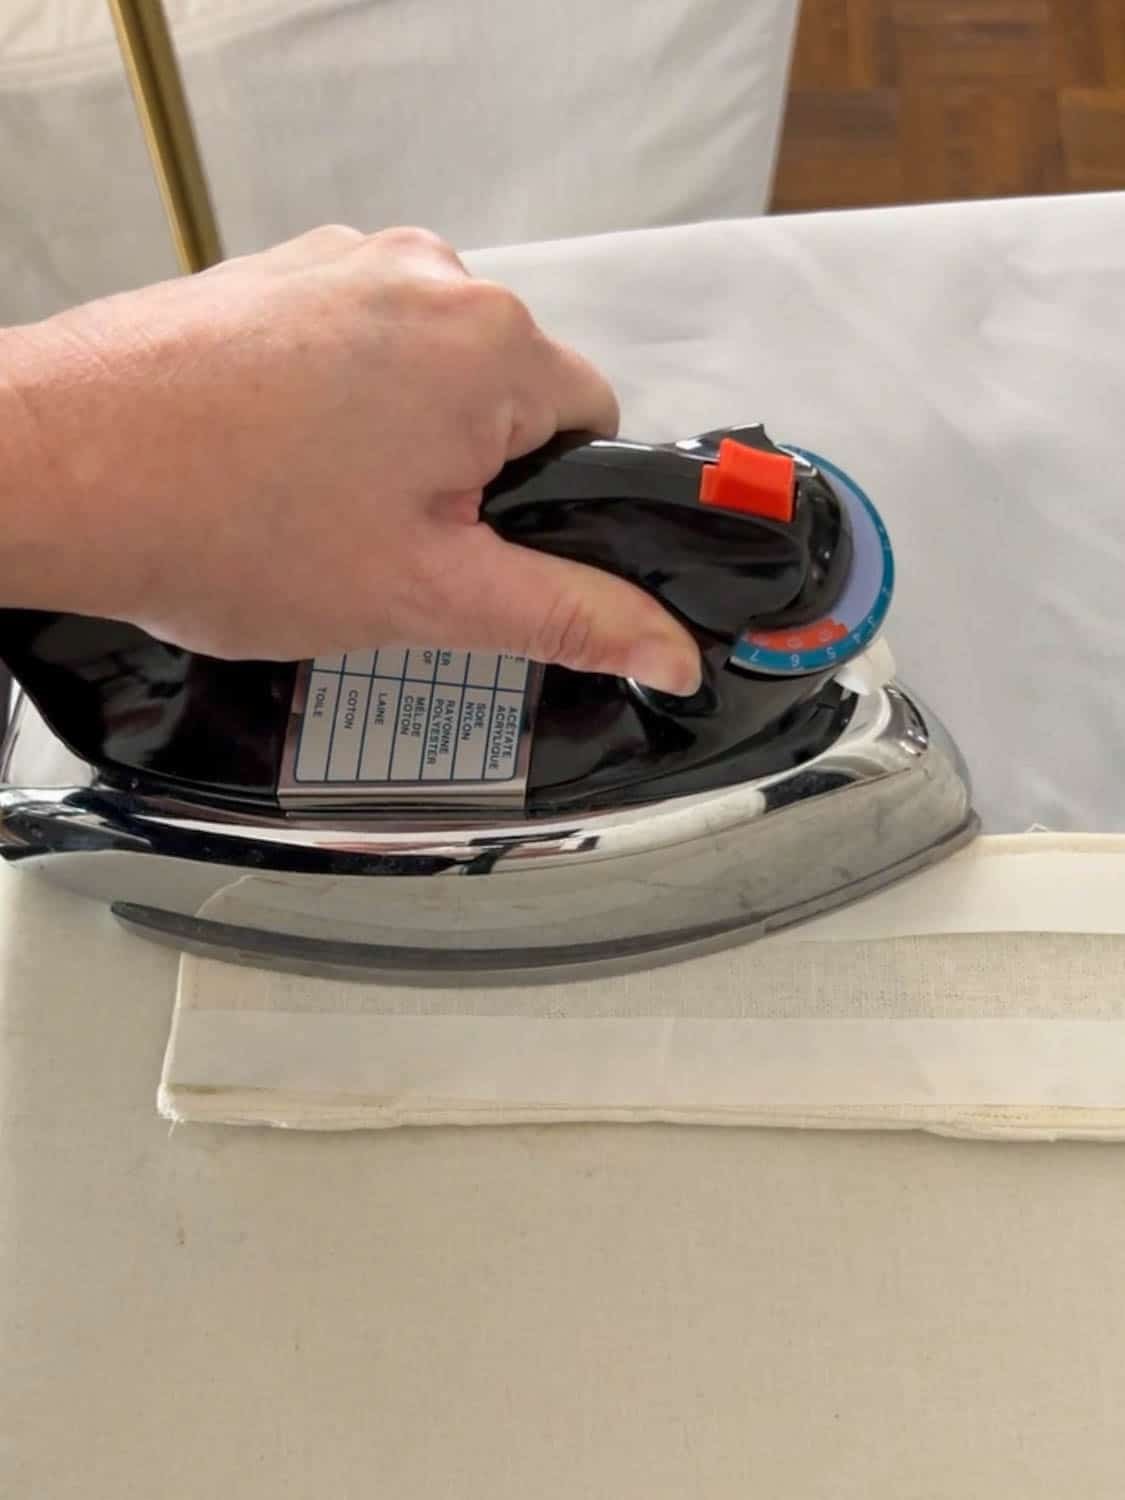
Set your iron temperature to medium. Press and hold the iron against the hemming tape for a few seconds until it adheres to the backside of the curtain panel.
Peel away the paper on the hemming tape that is currently facing up.

Place the header tape on top of the hemming tape. Press and hold the iron onto the header tape for a few seconds in sections until the hemming tape adheres to it underneath.
You’ll be able to hang the new header from hooks later.

How to Add a Curtain Border Without Sewing
I found this leaf curtain trim tape for just $3 per yard! It looks so similar to the trimmed curtains from Frontgate I fell in love with.

Step 1 – Measure and cut trim and hemming tape
Measure and cut the Heat n Bond tape and the trim to be the same length as the curtain panel.
Quickly run a lighter along the cut edge of the trim or apply clear nail polish to prevent fraying.
Step 2 – Attach hemming tape
Use the same procedure as Step 4 above to iron on the hemming tape at the edge of the curtain panel. (Just follow the instructions on the back of the Heat n Bond packaging.)
Make sure to pay attention to which side of the curtain panel you’re applying the tape. The left panel will have trim on the right side. The right panel will have trim on the left side.


Step 3 – Attach trim tape
Pay attention to the direction of your trim tape to be sure the design is correct. (I wanted the “leaves” to face up in the design of my curtain border.)
Peel away the paper side of the hemming tape.
Place the trim tape on top of the hemming tape. Press and hold the iron onto the trim tape for a few seconds in sections until the hemming tape adheres to it underneath.

How to Hang Curtains
Using this header tape, there are lots of options for creating pleats. You can follow this hook method for DIY pinch pleat curtains.
I chose to stagger the pleating hooks. Just push the prongs of the pleating hooks into the spaces of the header. I finished it with these gold curtain rings.

Hang the curtain panels “high and wide” so that they’re about 2″-6″ below your crown molding.
Leave about 12″-18″ on either side of your window to have room for the curtain panel.
Related: How to Hang Curtains

I used this upholstery steamer to iron out any wrinkles. It’s my go-to upholstery steamer I’ve used for years and it never fails me.
In hindsight, I should have hemmed these curtains just 1 inch shorter so they would just “kiss” the floor. But I was worried they would be too short after adding the hooks. I might fix that later.

Regardless of a small flaw or two, they turned out so beautifully! Considering these cost me just $50 and the curtains that inspired this look would have cost over $2,000, I’d say that’s a huge victory.
These passementerie curtains be beautiful in a living room or dining room too.

What is passementerie?
Passementerie is the art of creating decorative trimmings and ornamental accessories, often used to adorn clothing, textiles, and furnishings.
Stemming from the French word “passements” meaning trimmings, it involves crafting intricate designs using materials like silk, metallic threads, beads, ribbons, and cords to add embellishment and luxury to various items.
Curtain Trim Ideas
If you like the look of passementerie curtains, here are more curtain trim ideas you can add to plain drapery panels.

This curtain trim looks so adorable with Regan’s chinoiserie wallpaper! Maybe she’ll just switch bedrooms with me. 😉
Have you ever made your own DIY curtains or done a no-sew method before? One of these days I swear I’ll learn how to use a sewing machine… just not today.
More Window Treatment Ideas
Frequently Asked Questions
Tablecloths, drop cloths, and flat bed sheets all make great curtains. Just hang them on a curtain rod with clip rings, and you’re set!
Kitchen towels make great no sew cafe curtains too.
Sewing your own curtains is usually cheaper than buying. However, you are trading that money saved for the time it takes to make them. If you have extra time to spare, go for it!


